[PKOS Study 3주차] GitOps System - Harbor 설치
- -
CloudNet@ 팀의 가시다님께서 Leading 하시는 PKOS 2기 Study 내용 요약
해당 Kubernetes Study 는 '24단계 실습으로 정복하는 쿠버네티스' 책을 기반으로 진행 중입니다.
이번 포스팅에서는 Harbor 를 설치하는 방법에 대해 알아보겠습니다.
1. Harbor
Harbor 는 k8s 에 반드시 필요한 Container Image 를 저장할 수 있는 Open Source Container Image Registry
Container Registry 종류
- Docker Hub
- Amazon ECR (Elastic Container Registry)
- Harbor
3개 외에도 여러 종류가 있으나,
주로 Public 에서는 Docker Hub
Cloud 환경에서는 해당 CSP 의 Container Registry
온프레미스에서는 Harbor 를 주로 사용하고 있습니다.
2. Harbor 설치
해당 포스팅에서는 Harbor 를 Helm Chart로 설치할 예정입니다.
설치할 helm chart 링크는 아래와 같습니다.
harbor 1.11.0 · helm/harbor
An open source trusted cloud native registry that stores, signs, and scans content
artifacthub.io
Harbor – Deploying Harbor with High Availability via Helm
Deploying Harbor with High Availability via Helm
goharbor.io
2.1. 사전 준비
- Helm 설치
- Kubernetes by kops
- Personal Domain
2.2. Helm Repo Add & Config
helm repo add harbor https://helm.goharbor.io
helm fetch harbor/harbor --untar --version 1.11.0

- 헬름 차트의 Default 설정을 변경해주기 위해 values.yaml 파일을 수정합니다.
vim ~/harbor/values.yaml
certSource: none
이미 AWS ALB 에서 ACM 을 통한 인증 처리를 하기 때문에 certSource 를 none 으로 변경
ingress.hosts.core / ingress.hosts.notary
Harbor 의 서비스 URL 을 개인 도메인 주소로 변경하기 위한 목적
ingress.controller / ingress.className
k8s Ingress 타입을 AWS ALB 로 지정
certSource: none

ingress:
    hosts:
        core: harbor.<도메인주소>
        notary: notary.<도메인주소>

    controller: alb
    className: alb

ingress.annotation
Default 가 Nginx Ingress 설정이라 해당 설정은 모두 주석 처리 해줍니다.
이후 AWS ALB 관련 Annotation 을 추가해줍니다.
    annotations:
        # ingress.kubernetes.io/ssl-redirect: "true"
        # ingress.kubernetes.io/proxy-body-size: "0"
        # nginx.ingress.kubernetes.io/ssl-redirect: "true"
        # nginx.ingress.kubernetes.io/proxy-body-size: "0"
        alb.ingress.kubernetes.io/scheme: internet-facing
        alb.ingress.kubernetes.io/target-type: ip
        alb.ingress.kubernetes.io/listen-ports: '[{"HTTPS":443}, {"HTTP":80}]'
        alb.ingress.kubernetes.io/certificate-arn: <Amazon ACM 의 ARN>

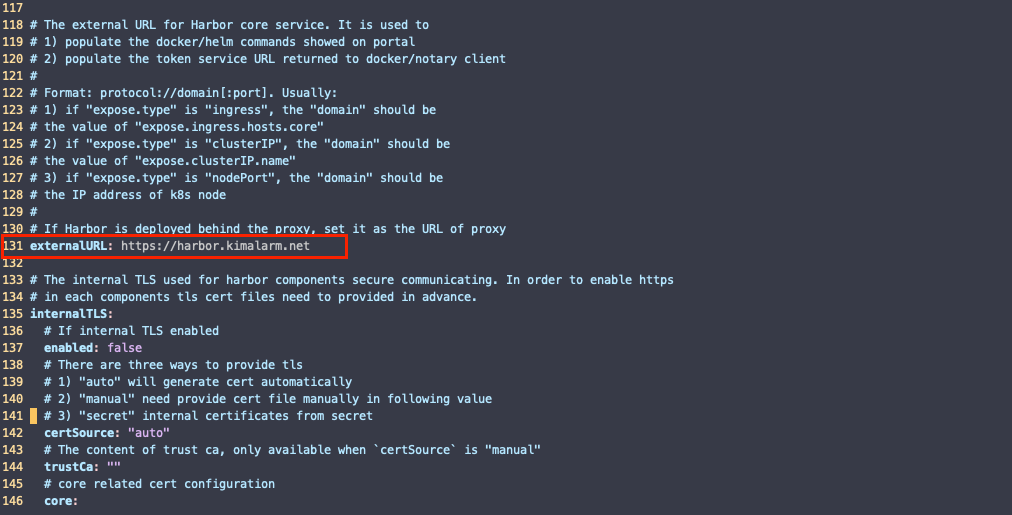
externalURL
externalDNS 를 위한 설정
externalURL: https://harbor.<도메인주소>

2.3. Harbor Install
- Harbor 를 위한 네임스페이스를 생성해준 후 helm chart 로 설치를 진행합니다.
kubectl create ns harbor

helm install harbor harbor/harbor -f ~/harbor/values.yaml --namespace harbor --version 1.11.0

- Harbor Service URL 로 접속을 해봅니다.
kubectl get ingress -n harbor

NAME                    CLASS   HOSTS                 ADDRESS                                                                      PORTS     AGE
harbor-ingress          alb     harbor.kimalarm.net   k8s-harbor-harborin-b2c0f21512-1559825938.ap-northeast-2.elb.amazonaws.com   80, 443   6m2s
harbor-ingress-notary   alb     notary.kimalarm.net   k8s-harbor-harborin-5595d67955-48690292.ap-northeast-2.elb.amazonaws.com     80, 443   6m2s

Harbor 에 로그인합니다.
기본 ID / PW 는 admin / Harbor12345 입니다.
ID: admin
PW: Harbor12345
3. Harbor 사용하기
Harbor 는 Project 단위로 Container Image 를 관리하고 사용자 권한 설정이 가능합니다.
3.1. Harbor Project 생성
테스트를 위해 신규 Project 를 생성해봅니다. (Public Access 로 생성하였습니다.)
Public Access
해당 레지스트리에 올라간 이미지는 누구나 권한없이 다운(Pull)이 가능합니다.
하지만 로그인 하기 전까지 이미지를 업로드(Push) 할 수는 없습니다.

3.2. Harbor 에 Image Push
실제 Harbor 에 이미지를 업로드 해봅니다.
간단하게 Nginx , busybox 이미지를 올려봅시다.
docker pull nginx && docker pull busybox
docker images

Harbor 업로드를 위해 Image Tag 를 변경합니다.
docker tag busybox harbor.<도메인 주소>/<프로젝트이름>/busybox:0.1
docker tag nginx harbor.<도메인 주소>/<프로젝트이름>/nginx:0.1

Harbor 업로드를 위해 Harbor 에 로그인을 합니다.
docker login harbor.kimalarm.net -u admin -p Harbor12345
docker push harbor.kimalarm.net/kimalarm/nginx:0.1
docker push harbor.kimalarm.net/kimalarm/busybox:0.1


3.3. k8s 에서 Harbor 이미지 사용
Harbor 에 이미지를 올렸으니 해당 이미지를 사용해봅시다.
busybox 를 배포하는 Deployment yaml 을 가져와서 Image 저장소를 Harbor 로 변경해줍니다.
curl -s -O https://raw.githubusercontent.com/junghoon2/kube-books/main/ch13/busybox-deploy.yml

vim busybox-deploy.yml

apiVersion: apps/v1
kind: Deployment
metadata:
  name: busybox
  labels:
    app: busybox
spec:
  replicas: 1
  selector:
    matchLabels:
      app: busybox  # POD label과 일치
  template:
    metadata:
      labels:
        app: busybox # Selector label과 일치
    spec:
      containers:
      - name: busybox
        # image: busybox
        image: harbor.<도메인주소>/<프로젝트이름>/busybox:0.1
        command:
        - "/bin/sh"
        - "-c"
        - "sleep inf"

kubectl apply -f busybox-deploy.yml
이후 Pod 이벤트를 보면 Harbor 에서 이미지를 가져온 것을 확인할 수 있습니다.
kubectl describe pod | grep Events: -A7

3.4. Triby 로 Image 취약점 Scan
Harbor 는 기본적으로 Triby 스캔 기능을 제공해주고 있습니다.

수동 스캔 - 해당 이미지 선택후 Scan 클릭

자동 스캔 - Project Configuration 에서 설정 , Image Push 시 스캔

'AWS > EKS' 카테고리의 다른 글
| [PKOS Study 3주차] GitOps System - ArgoCD 설치 (0) | 2023.03.26 |
|---|---|
| [PKOS Study 3주차] GitOps System - GitLab 설치 (1) | 2023.03.26 |
| [PKOS Study 2주차] Kubernetes Storage ( emptyDir, hostPath, PV/PVC ) (0) | 2023.03.19 |
| [PKOS Study 2주차] 쿠버네티스 Service, Ingress (LoadBalancer controller) (0) | 2023.03.19 |
| [PKOS Study 2주차] Kubernetes Network ( AWS VPC CNI ) (0) | 2023.03.18 |